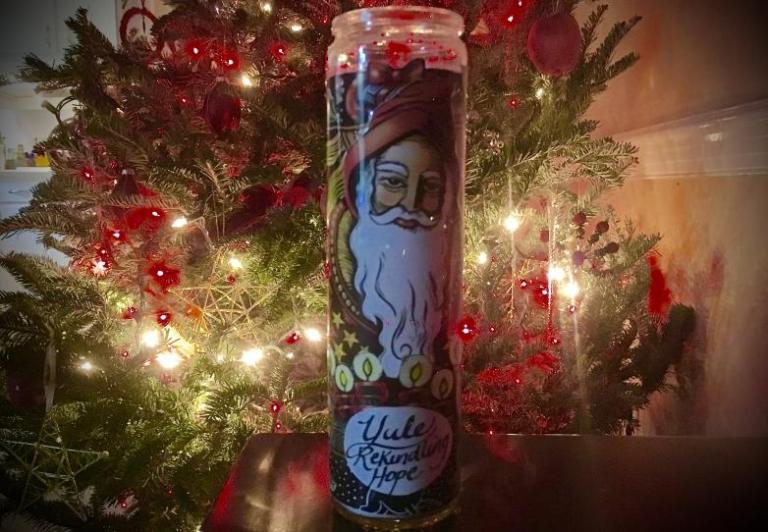
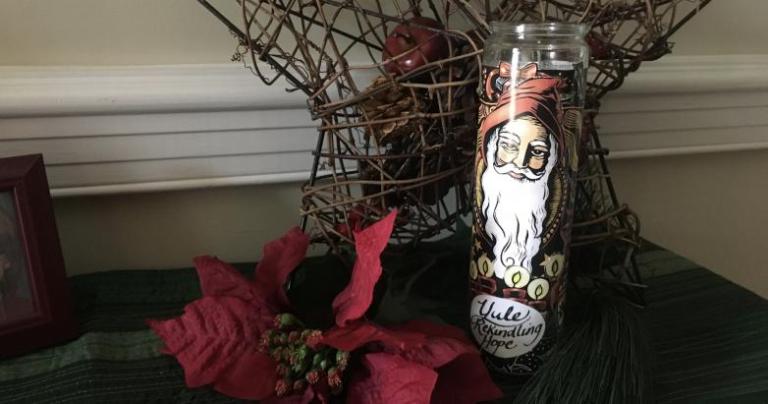
I love the artwork on wall calendars – especially the Llewellyn’s Witches’ Calendar, which is in it’s 21st year of production. Every month I enjoy the beautiful, scratch-work images of Kathleen Edwards that illuminate the tides of the season. For the yearly retail price of $14.99, these calendars printed on high-quality, glossy paper are a 13-fold treasure to the crafty witch. (1) The artist already created the images to invoke the power of that season; to throw these prints in the garbage would be a crime! So, this Yule I made a 7-Day Candle to “Rekindle Hope.”
I harvest calendar images and utilize them in all sorts of witchy ways: composition journal covers, decoupage on spellboxes, illumination in my Book of Shadows, framed altar images, and hand-made greeting cards. I’ll glue an image onto a black folder for each sabbat ritual script. I even cut out the tiny preview image on the back cover of the calendar and glue them on match-boxes. By far, my favorite calendar reuse, is decorating 7-day spell candles.
Crafting a Yule Candle to Rekindle Hope
Craft Materials for the Candle:
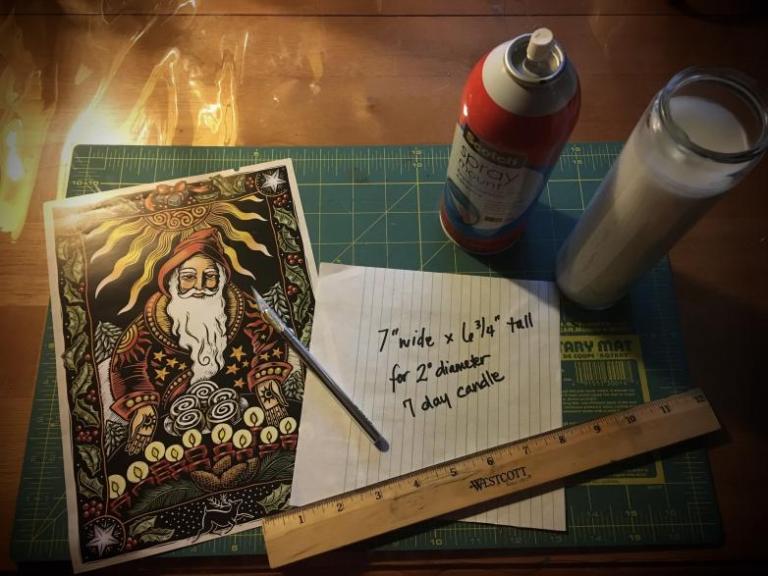
- 2″ diameter x 7″ tall, plain glass, 7-Day Sanctuary candle in white. These are typically found at Dollar Stores, Metaphysical stores, and near the Mexican grocery items at your average food market. Despite owning my own witchy store, I picked this one up at Publix Grocery for $1.79.
- An appropriate calendar image: This one of “Santa,” or “The Holly King,” I’ve been saving for a while. It was from the month of December in the Llewellyn Witches’ Calendar from 2015, I think; artwork is by Kathleen Edwards.
- Note: Please honor copyright and intellectual property by not reproducing and distributing another person’s images without permission. However, if you bought the calendar, that print is yours to utilize for your personal happiness.
- An exacto knife, and a safe cutting surface, like this self-healing rotary mat I use for quilting.
- Straight-edge ruler
- Spray mount adhesive and a glue stick
- Scotch tape, and a roll of clear packing tape.
- Pen and a scrap of heavy paper
-
Craft Materials Needed for Custom 7-Day Candle using old Calendar Image by Kathleen Edwards, from the Llewellyn Witches’ Calendars – Witch on Fire
Step One: Preparing the Yule Candle Wrapper with Calendar Art
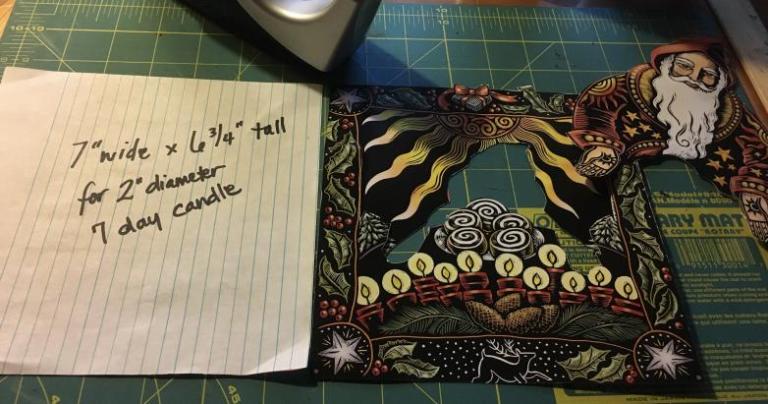
Begin by cutting a 7″ wide by 6 3/4″ tall template from scrap paper. This is the size of the candle wrapper you’ll need to prepare to fit around your standard 2″ diameter sanctuary candle. The trick here is to cut down the calendar image to fit this dimension, without losing the integrity of the artwork. On Llewellyn’s Witches’ Calendar, all of Kathleen Edward’s frames are taller than you’ll need, but EXACTLY the right width…very handy.
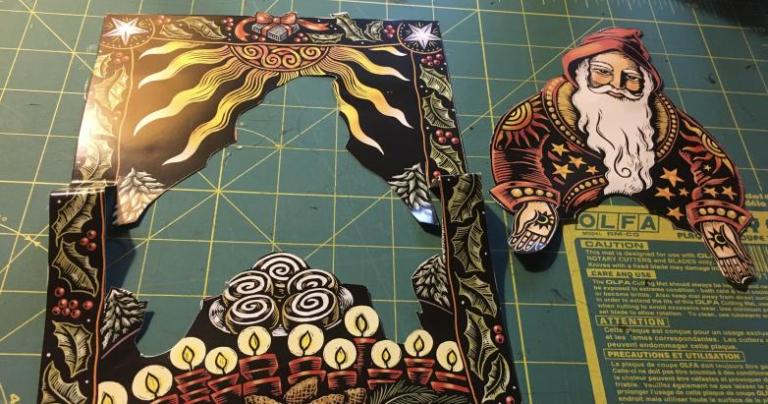
I chose to cut out the main figure of Santa first, and let the image of the cakes be cut away, as I was focused on the candles, sun and foliage as the important parts of my spell. Then I folded up the edges until it was the correct height, and cut away the excess in a way that spliced the border back together – it won’t be “perfect” but well enough will do. Because we’ll be illuminating this image from the back, try not to doubled up the paper.
This splicing job was a bit tricky, because I wanted the candles to look like they were in front of Santa. With my exacto knife, I cut around the tops of the candles on the background. Then I cut around his hands and up his sleeves just enough to tuck his belly and beard behind, and his hands on top. I used glue stick to affix the Santa image in place on the the top. Then I turned it over and carefully removed the overlapping background. Having a light table, or a back-lit window pane, to trace the overlapping parts to remove, made that easier.
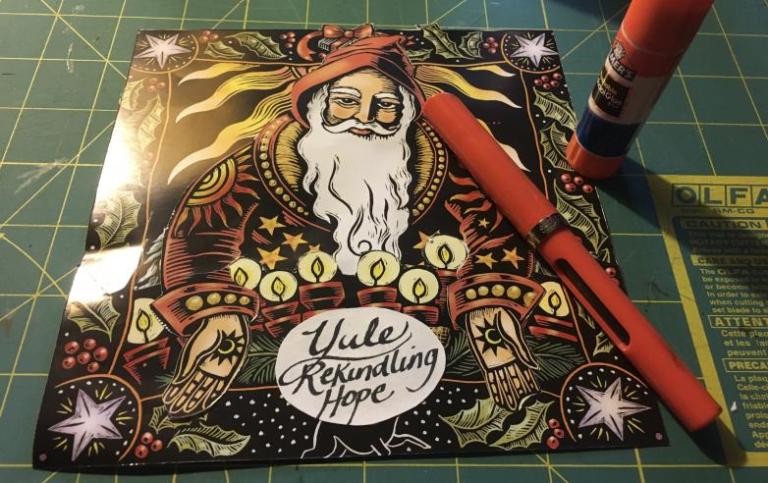
On a scrap of heavy paper, I used my consecrated calligraphy pen to write my intention. My favorite pens are Sheaffer brand – and I got mine at Staples Office Supply. After cutting it out, I glued it in place with the glue stick. The resulting candle wrapper fits the paper template exactly. If I meant to use this candle myself – rather than give it as a Yule gift, I would then write out my full “Petition Spell” on the back side before affixing it to the candle. Remember that this candle will burn up to 7 days in the house while the rest of the family shuffles around, yet spells are private business.
Step 2: Wrapping the Yule Candle
To affix the image to the glass, begin by cutting two lengths of clear packing tape about 8″ long, and have them standing by. Then (outside, preferably, because toxins and mess) lightly mist the spray mount glue over the back of the wrapper. Roll it loosely around the glass candle. This takes some finesse – the good news is that you’ll have a few minutes of wet glue-time time to wiggle it around on the glass until it is mostly straight and the corners all meet evenly. However, the edges are going to pop up…this gives you time to tape them down.
Align one stripe of tape down one edge, hanging off by half. While smoothing the wrapper down evenly with your fingers, press the tape down onto the glass. Now, affix the other stripe of tape the other edge sticking up. Smooth the wrapper down from the other direction. until it stretches all the way to meet the first taped edge. Then smooth that tape down over the other flap. Trim the excess tape.
With two more stripes of packing tape, go around the bottom and top edge of the wrapper, for strength, and to keep any errant spliced edges from popping up in the middle. Packing tape is your friend and the equalizer of splicing irregularity.

Step Three: Loading and Dressing the Yule Candle
Magickal Materials Needed:
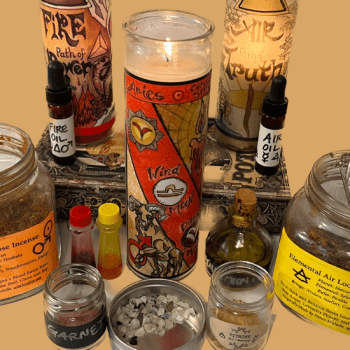
Any herbs or stones of Fire, Sun, and Capricorn are appropriate – there are a bunch listed here in my Yule incense and oil recipes. If you’ve already made those recipes, I suggest just using a teaspoon of the incense, and 9 drops of the anointing oil in the candle. I opened up my Witchy cabinet and let my nose and intuition guide me to these selections. I tend to collect materials for this purpose, so I pulled from what I had on hand.
- Phillips Head Screwdriver
- A spare chopstick, or toothpick for poking bits into the holes.
- Three Emerald stone Chips
- Three Garnet Stone Chips – or in my case, I used garnet stone granules, which are pictures in that baggie and are BRILLIANT for use in candles and incense blends. I obtained this package from AzureGreen.net
- A Pinch of Cinnamon powder, and three small chips of bark
- Three Juniper Berries
- Pinch of Frankincense powder and/or three tears
- 3 whole clove spikes and/or a pinch of clove powder
- 3 drops each of the essential oils of Pine Needle, Cinnamon, Ginger, and Clove.
-
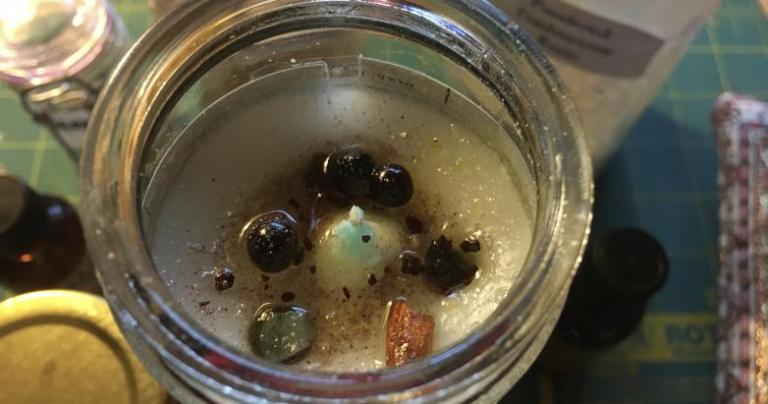
Loaded Candle Top – Three holes drilled into wax, filled with stones and botanicals, dressed with essential oils. Ingredients for dressing the candle for Yule intention of “Rekindling Hope.” – Witch on Fire
To load a glass sanctuary candle, take a Phillips head screwdriver, and twist out three holes in the wax, an inch or more down. I’m sorry I didn’t snap a pic of this part, but basically just pretend you are screwing something in, while burrowing down into the wax. Occasionally pull out and dump away the wax shreds.
With the chopstick or toothpick, poke into each hole one of each chunk of herb, then stone chips. Then top with a light dusting of the powders and a drop of each essential oil into each hole. Awaken each ingredient to it’s purpose as you add it to the candle. Yes, I tap upon, gently blow over, and talk to these items while I work – witches are wyrd like that. My allies in the plant and mineral realms are much happier to work with if I appeal to the Spirit within and gain cooperation first.
You want most of the flammable botanical stuff deep in the wax, or pushed away from the wick, so you don’t accidentally ignite the plants before the wax has begun to melt, so I add the stones last. You want those herb-y parts to just “steep” in the hot wax while burning, never ignite. Don’t forget my first rule of Witchcraft is “Don’t Burn the Witch.” lol
Step Four: Blessing and Charging the Yule Candle
After all is complete, go meditate while holding onto the candle; try this Yule Candle meditation that I posted here. Seek out the powers of the winter sun, and once connected, channel those energies through your hands into the candle. Awaken the whole thing to it’s purpose of “Rekindling Hope” as the new light of Winter Solstice, born from darkness into the new year.
Remember, YOU ARE THE MAGICK, not the candle. This Yule candle is a physical symbol of the partnership you have with allies in all realms. Your intentions and energies invested into this symbol merely anchor your Divine power here on earth. It helps broadcast that power into the world to create change in accordance with your Will.
So that I could give this candle as a gift at Yule, I sealed the top of the candle with a layer of packing tape over the top, tied down to the glass with ribbons.
May all your Yule’s be Merry and Bright,
~Heron
- Mind you, I own a witchcraft shop and have access to just about any prepared spell candle on the market, but I promise you that home-made magickal items are far superior to anything off the store shelf. Hint: This could be why I’m a mediocre retail business-witch.